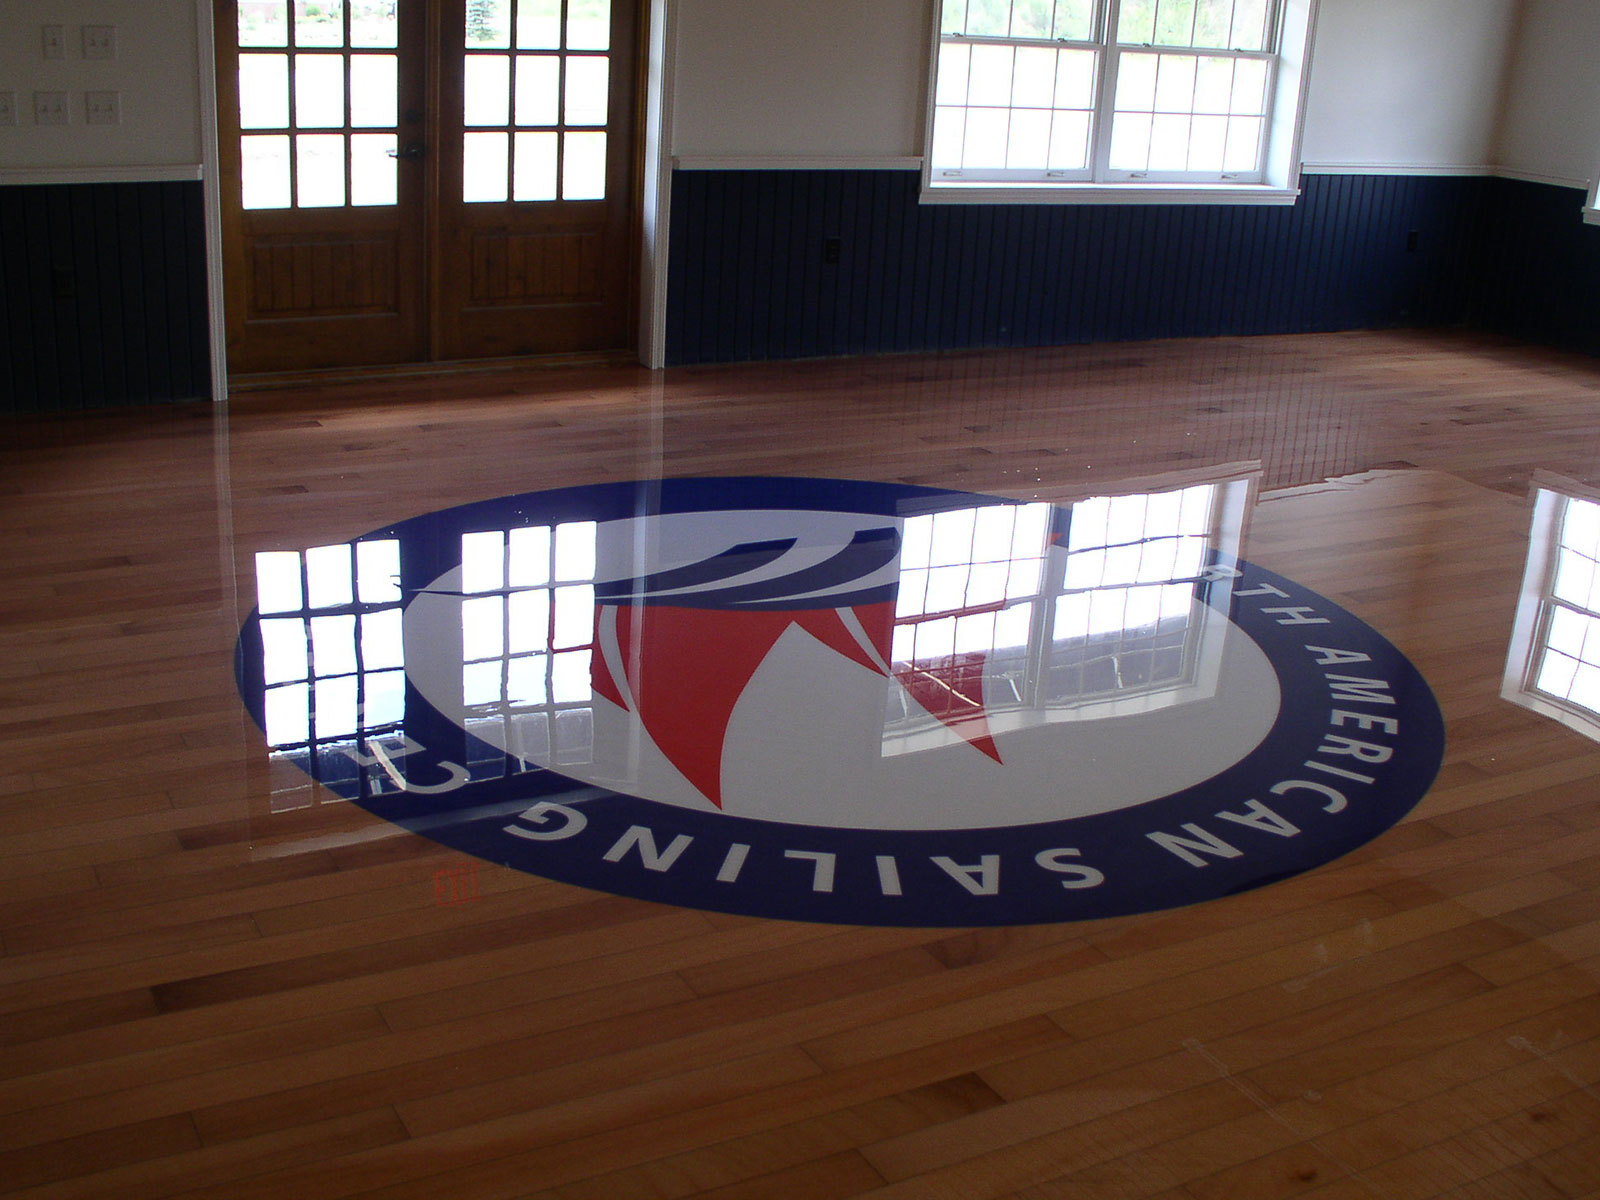
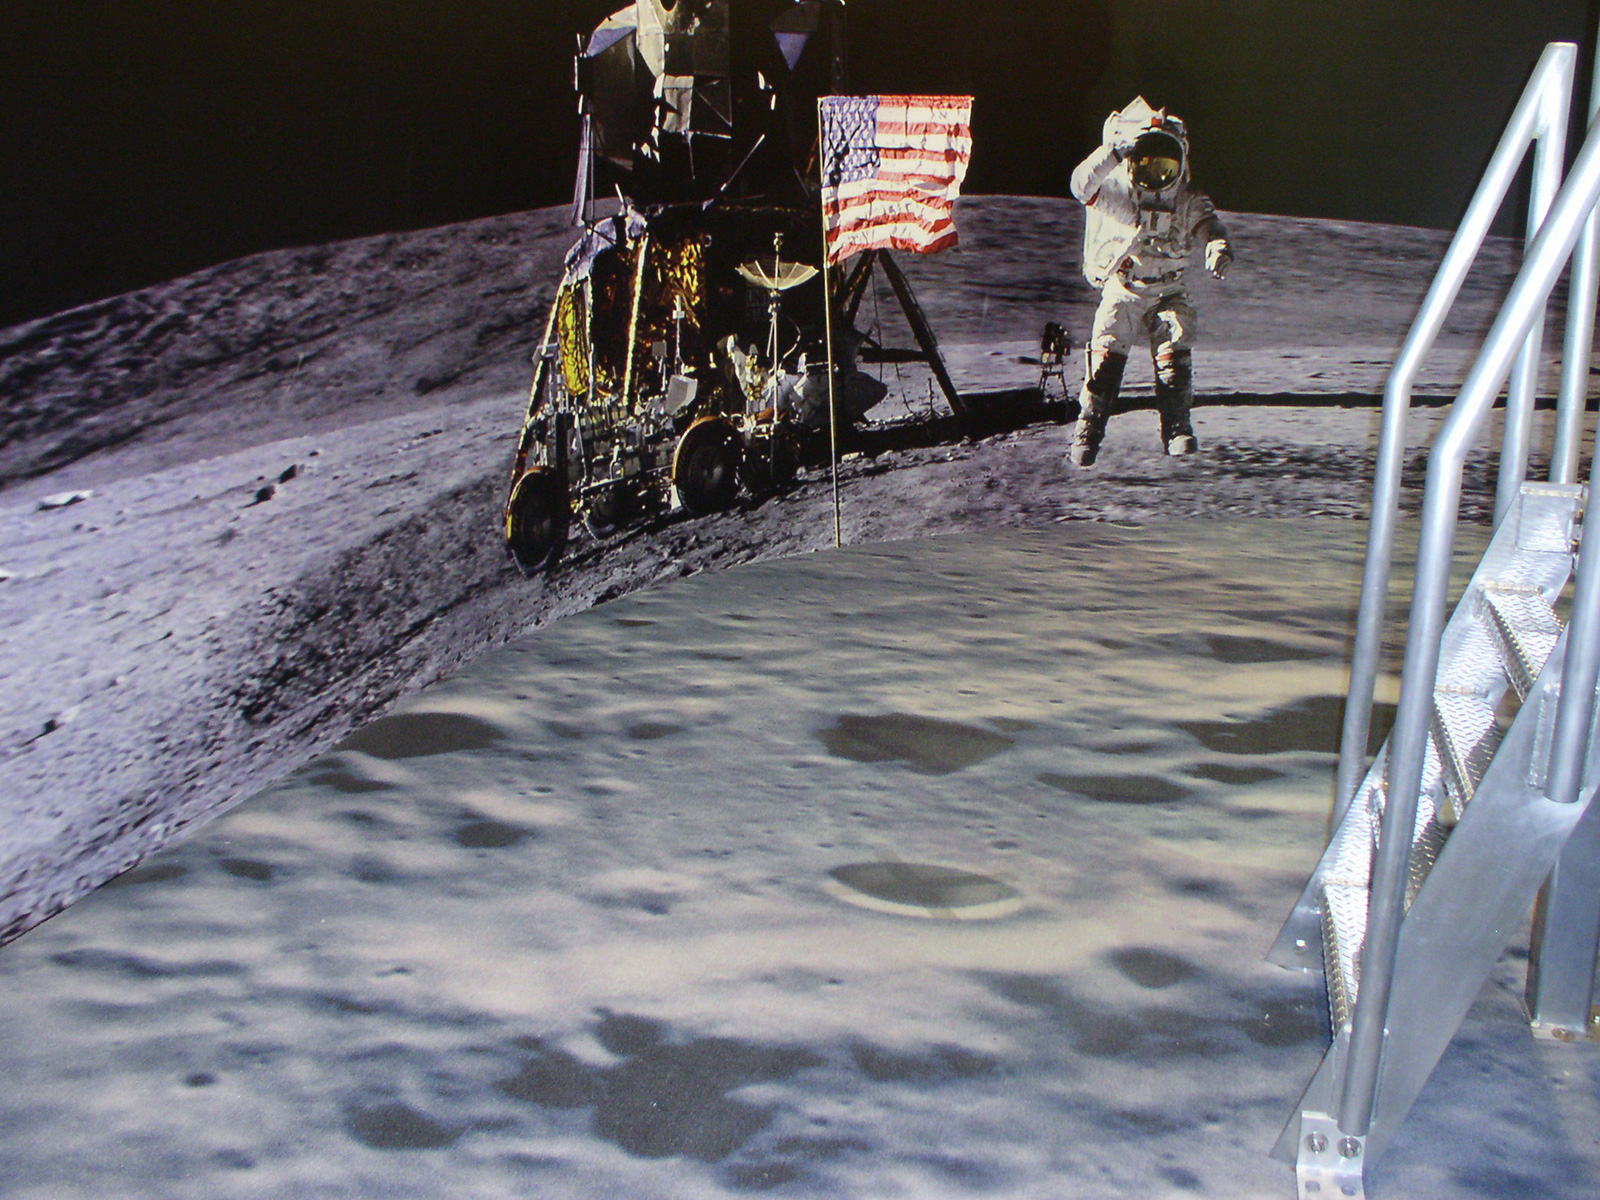
Lobby Entrances
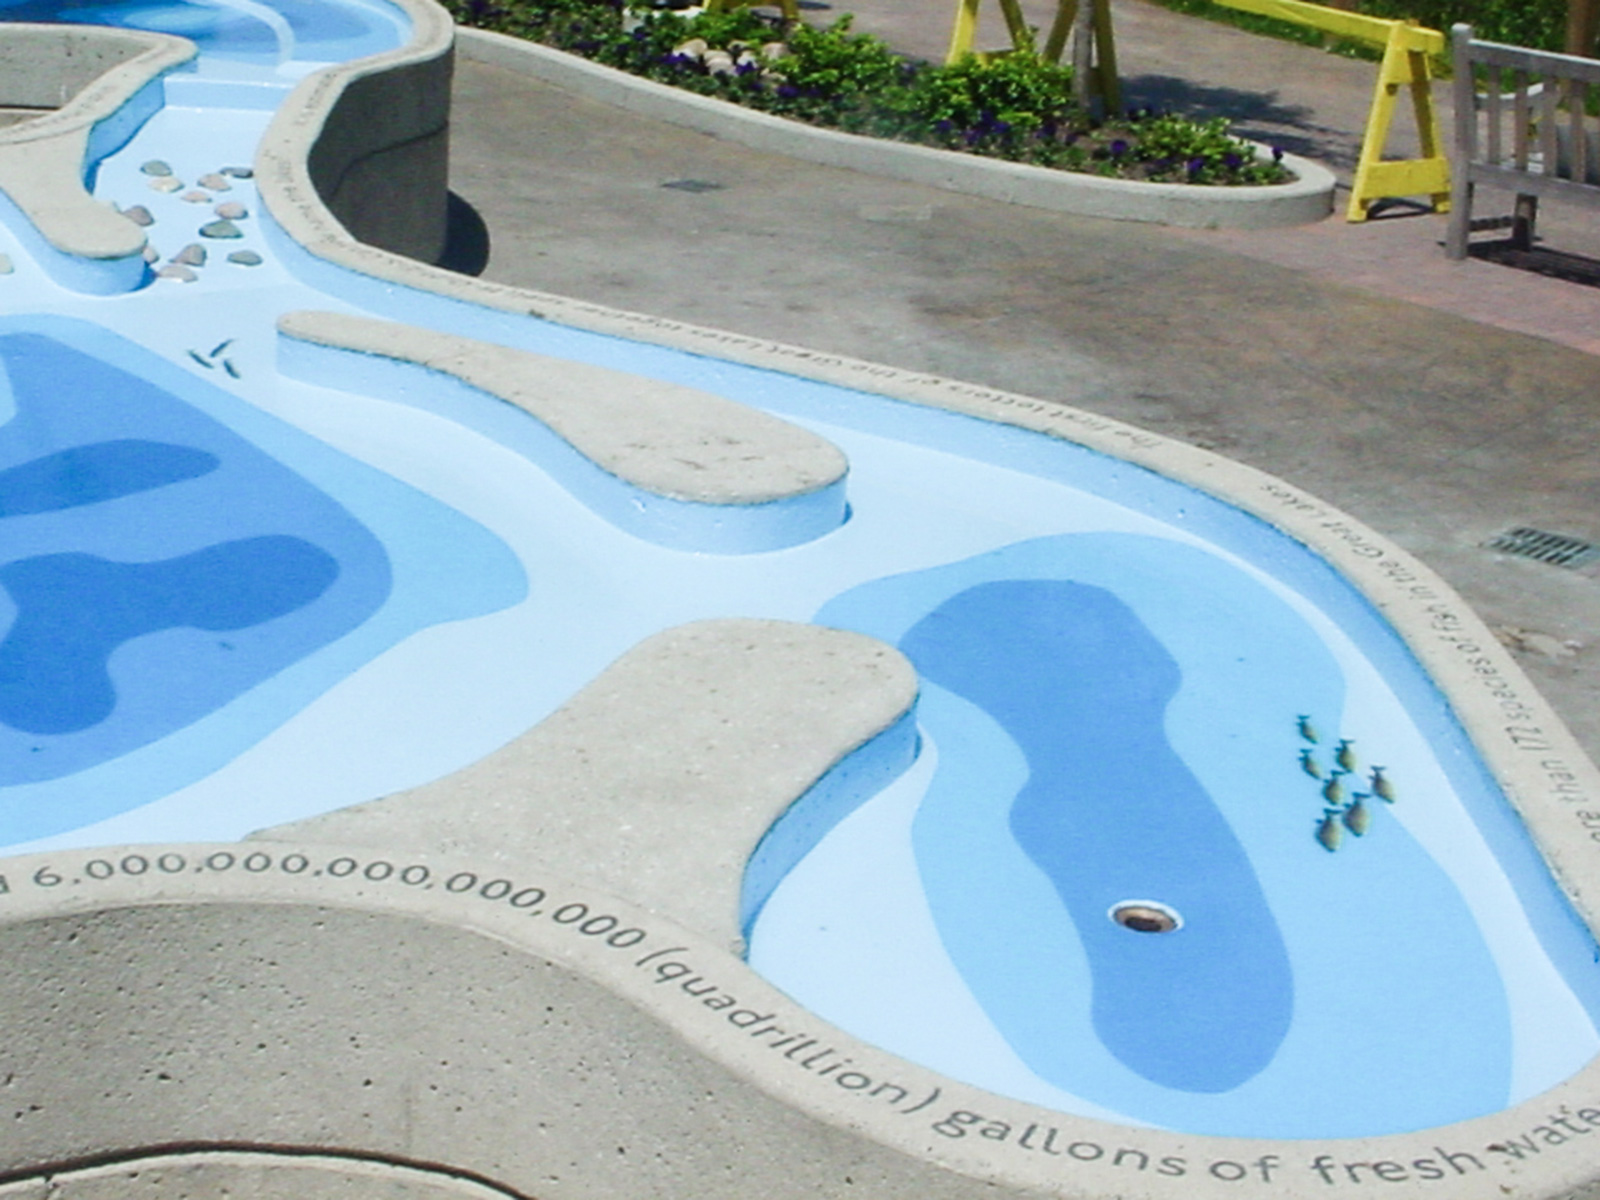
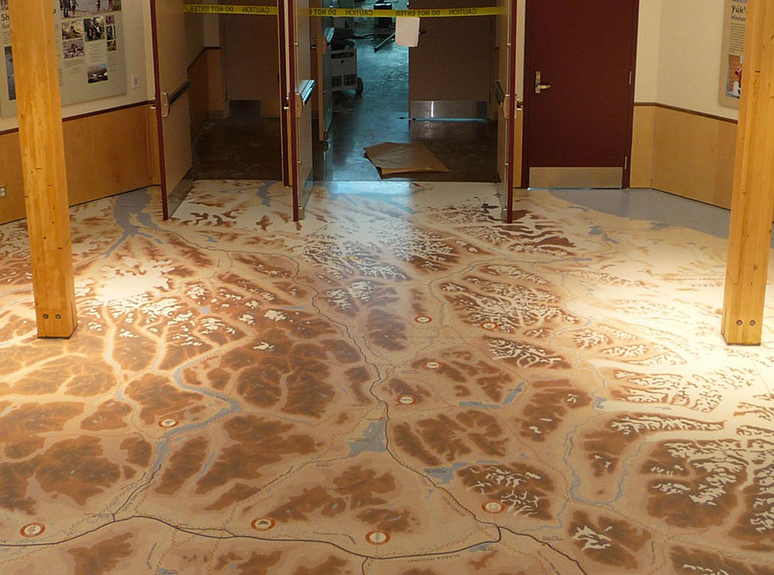
Schools and Gymnasiums
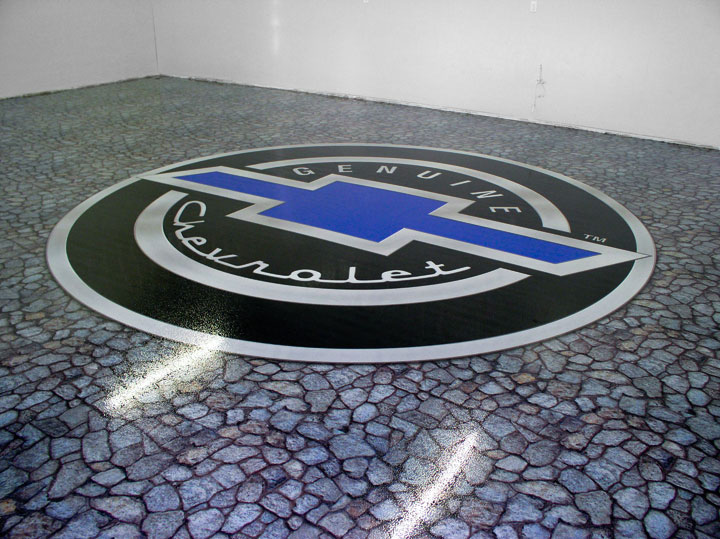
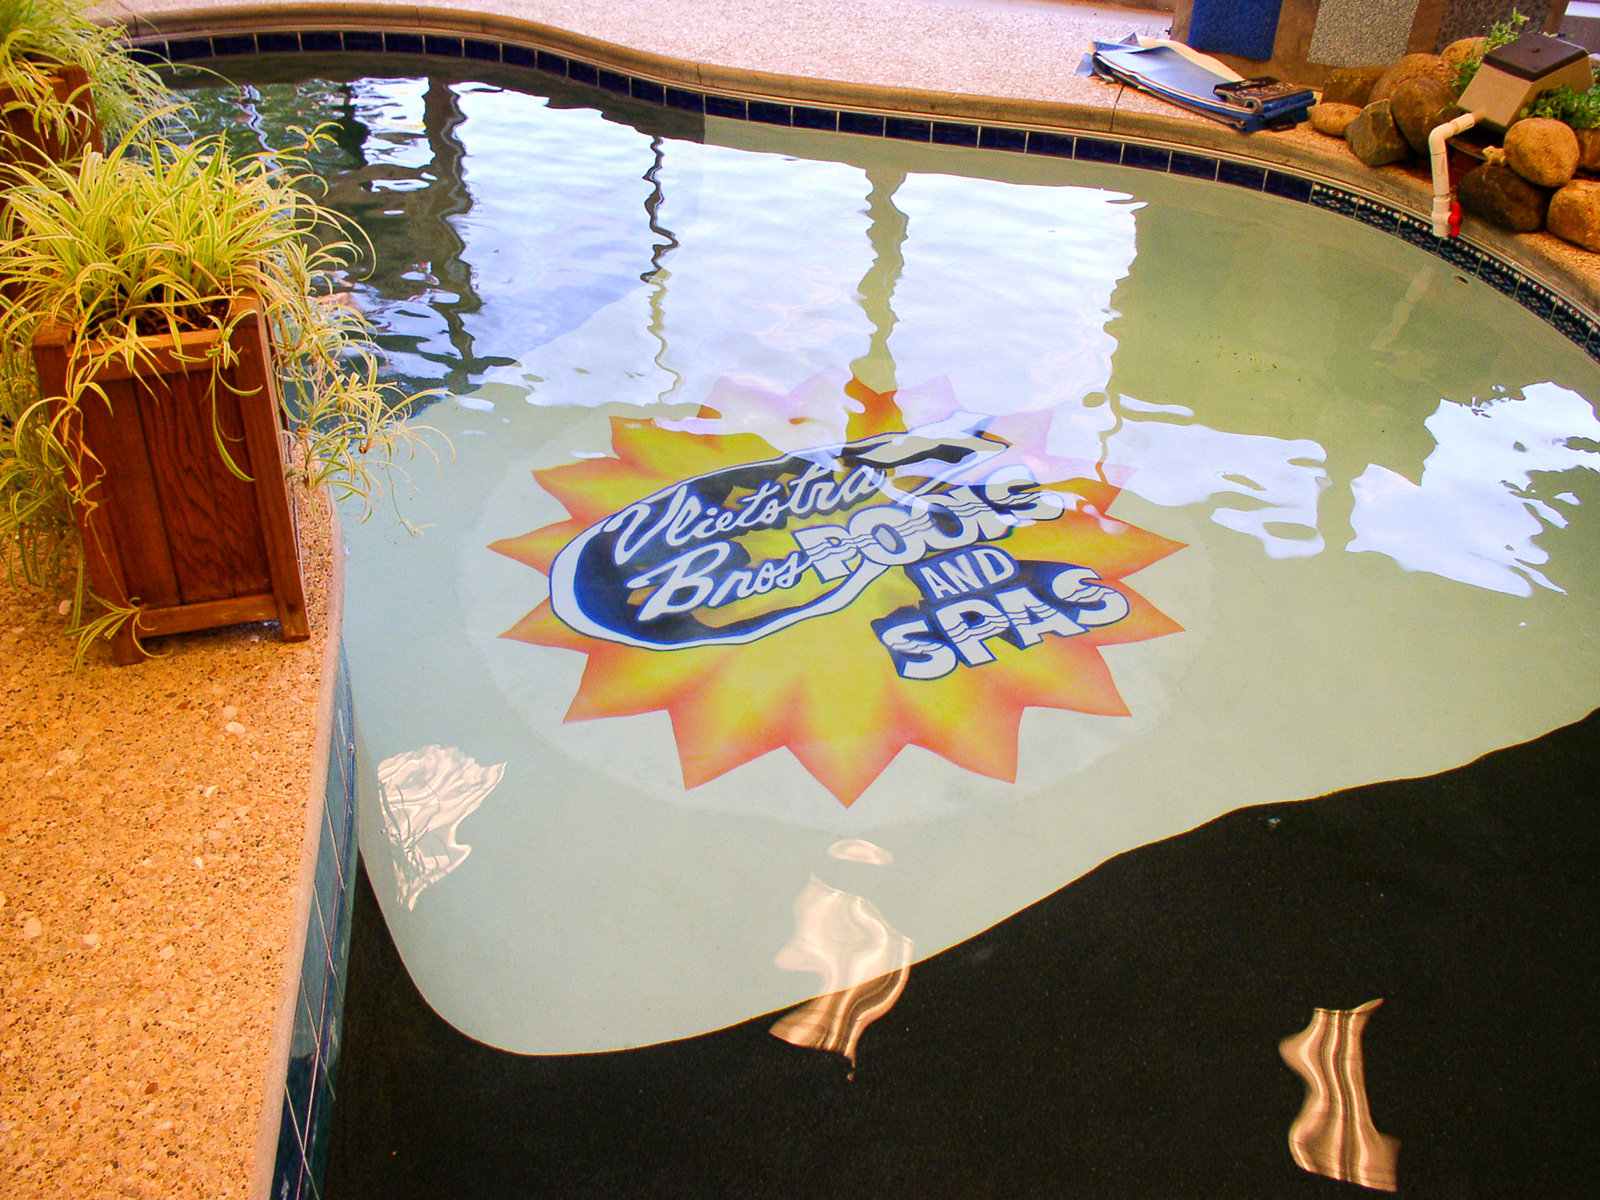
Retail Environments
Installation
Installation instructions for using FloorPix® in epoxy and MMA floor coating systems are below. Create custom floors by incorporating artwork, photographs, logos and corporate colors in your next decorative concrete flooring project.
Step 1
Test FloorPix® material in your shop using your epoxies and the instructions below. This is the most critical part of the process and your best way to insure a successful installation!
Step 2
Basic Floor Prep: Bead blast the fully cured concrete slab. Patch any holes and expansion joint or saw cuts with a quality joint filler.
Step 3
Apply a 5 to 10 mil primer coat of clear or colored epoxy over the prepped floor and allow the primer to cure. We recommend using a colored primer to cover any patch work and to help conceal any gaps that may show up when butting FloorPix® panels.
Step 4
Lay FloorPix® material down onto the fully cured primer coat and position material in place, cutting in walls, posts, cabinets or any other obstructions if required. FloorPix® panels should be butted up to one another, as overlapping the material will cause puckering. No glue or tape is required to hold panels in place.
Step 5
1st Top Coat: Pour a 16-mil coat of epoxy over the FloorPix® material and roll evenly. The epoxy will migrate through the FloorPix® perforations and bond to the primer coat.
Step 6
2nd Top Coat: Before applying the 2nd top coat, examine the FloorPix® and floor for any air pockets or irregularities. If air pockets are found, backfill them with a hypodermic needle or cut them with scissors followed by back coating them before applying the 2nd 16-mil coat. The 2nd top coat can be rolled or troweled.
Step 7
3rd Top Coat: Apply another 16-mil coat of epoxy for the final layer. Please note: the thicker the layers, the better the result will be. We recommend using a non-skid or orange peel finish to be applied in conjunction with the 3rd coat. Choosing a matte finish will minimize the appearance of marks, dust and dirt.
Installation Tips
- Match the primer color to the most dominant color used on the FloorPix® image to help conceal any seams during installation.
- Wear football spike shoes when applying your first coat of epoxy—the wider spikes will not pick up the FloorPix® material. Wear golf spike shoes on the 2nd and 3rd coats.
- Be sure to inspect for any pockets or irregularities in the FloorPix® before applying 2nd coat. It is much easier to fix problems at that point.
- Proper installation requires 48-mils of topcoat. This will assure best results.
- If out-gassing occurs, be sure to spike roll!
- Colored markers can be used to fill in gaps that will occur between panels. Please test your colored markers with epoxy before using on actual job.
- If sanding is required, identify any “high spots” in the floor and hand sand these areas. Anytime sanding over the FloorPix® is required, we recommend hand sanding to insure the graphic does not get damaged.
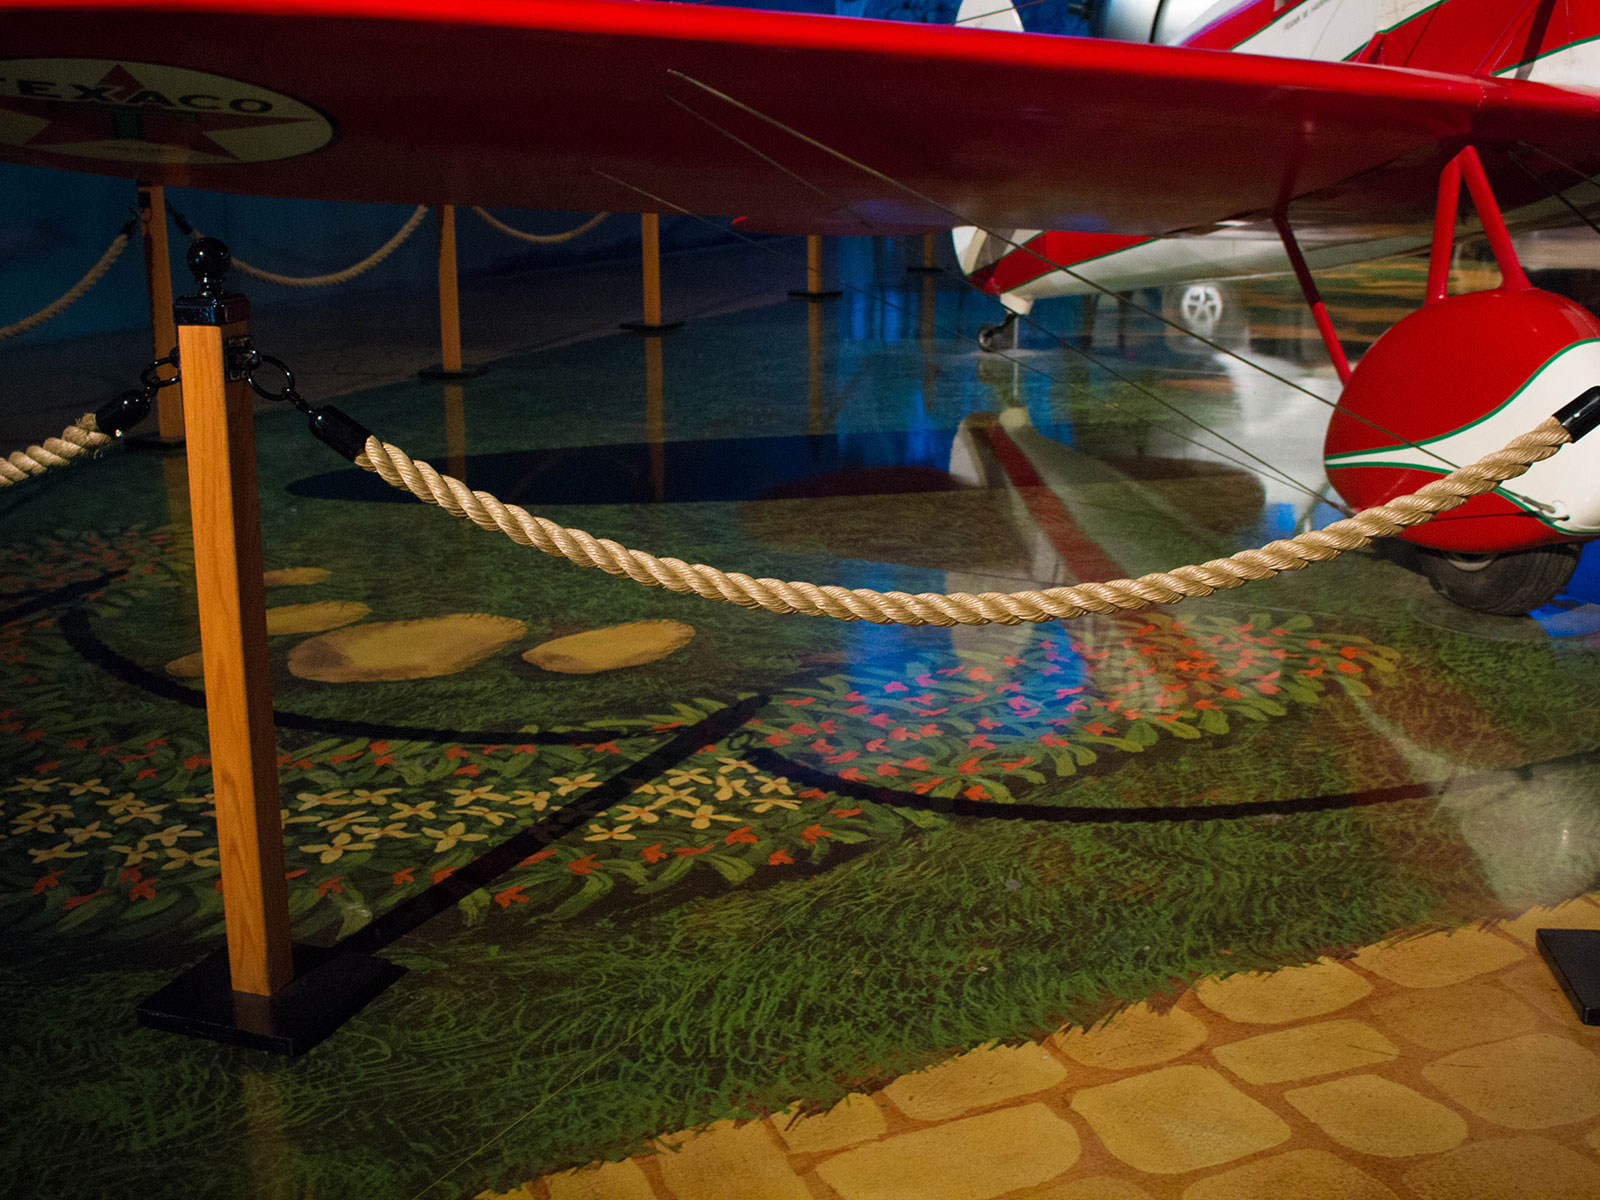
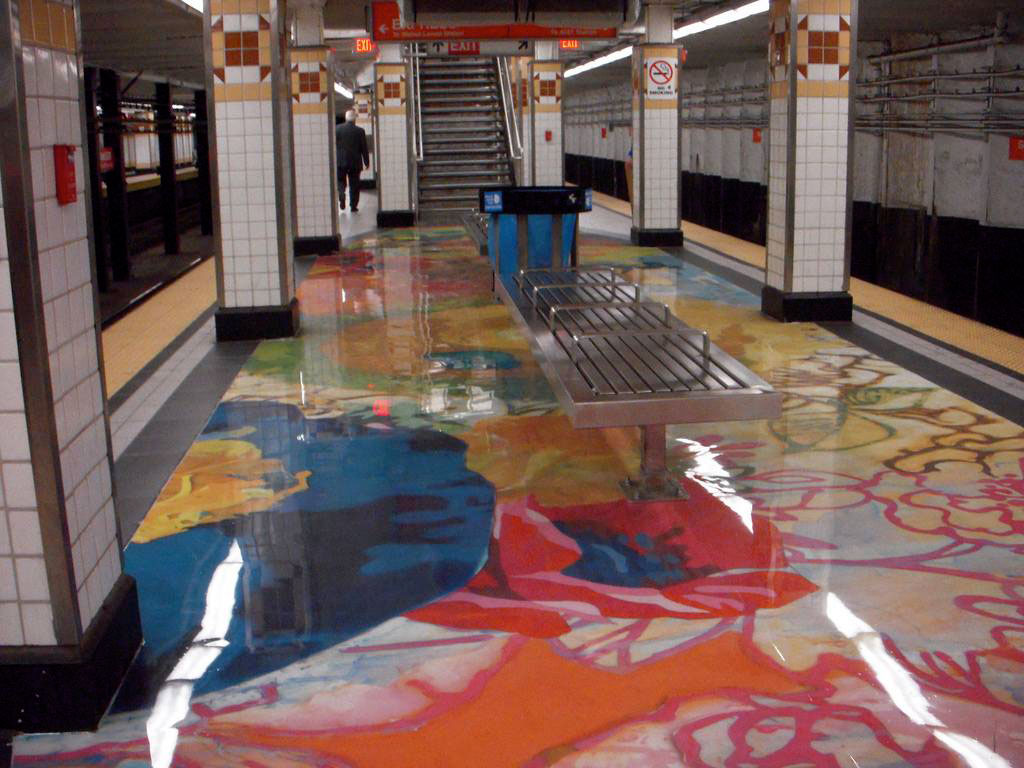
FloorPix® Examples
File Preparation
![]()
Raster Images
Submit your logo, photographic image or native raster file with a minimum resolution of 100ppi at final output size. Files should also be converted to CMYK before submitting them to avoid color shifts. Native layered Adobe Photoshop files are preferred but .tiff and .jpg files are accepted as well.
![]()
Vector Files
Vector files are the preferred file format for printing your next FloorPix® project, as they can be enlarged to virtually any size without compromising image quality. Please send us your native Adobe Illustrator files with fonts or submit an EPS file with fonts converted to outlines. We will match specified PMS colors in your file as close as possible.
Frequently Asked Questions
Does my FloorPix® Include Installation? If not, who installs it?
Our pricing does not include installation. But we can help you find an installer in your area that has used our FloorPix® material.
Where is FloorPix® available? (National/International)
We ship your FloorPix® order to you or directly to your job site no matter where in the country you may be. International shipping is also available.
Who can I speak with about file preparation?
Help is available here on this site. If you have already been to this section and still need assistance you may call and speak with one of our file prep technicians: 800.982.4533
How is shipping handled?
Your FloorPix® will be put into a tube and will typically be shipped via FedEx. Shipping costs are not included in our pricing.
What is the typical life expectancy of a FloorPix® Installation? Is there a guarantee?
The life span of our product is dependent on the quality of the installation. If properly installed FloorPix® will last as long as the epoxy floor is maintained. We do not offer a warranty on our FloorPix®, as it is based on the installations.
What surfaces are acceptable for FloorPix®?
Any hard, smooth surface that is suitable for an epoxy floor system will work for your FloorPix® installation.
What kind of maintenance does FloorPix® require?
All maintenance procedures are the same as for any other epoxy floor surface. Sweep and mop to keep surface clean.
Can FloorPix® be driven on by cars and/or utility vehicles?
The same rules apply for the use on epoxy floors with or without FloorPix® underneath. Please consult with your epoxy flooring installer.
Is the finished surface of FloorPix® slippery? Are there options for the finished surface?
Just like any other epoxy installation you have numerous options for non-slip surfaces, such as orange peel, glass bead or broadcast silica. However, FloorPix® can be left smooth and glossy if desired.
What do I receive in a FloorPix® sample kit?
Our sample kit includes an actual printed sample of FloorPix® and a brochure which reviews installation instructions. You can request a sample kit by contacting us.
What payment methods are acceptable?
All FloorPix® purchases are charged to a credit card: Visa, American Express or Mastercard.
What sizes are acceptable for FloorPix®?
We can print your FloorPix® order as small as 8″x10″ and as large as you can imagine. We can print your FloorPix® seamlessly up to 16′ wide and as long as you need it to cover large areas.
Do I need to provide artwork before my FloorPix® project can begin production?
Our staff is skilled in all of the latest computer design software and is willing and able to build artwork when needed.
Does the number of colors in my artwork influence the cost of FloorPix®?
No, we can print your FloorPix® order in a single color or in as many colors as you want to use – the cost does not differ.